Navigation
There are some standard navigation aids to help browse the database. These are described below and might not show up in other areas of the manual.
Data Browsing
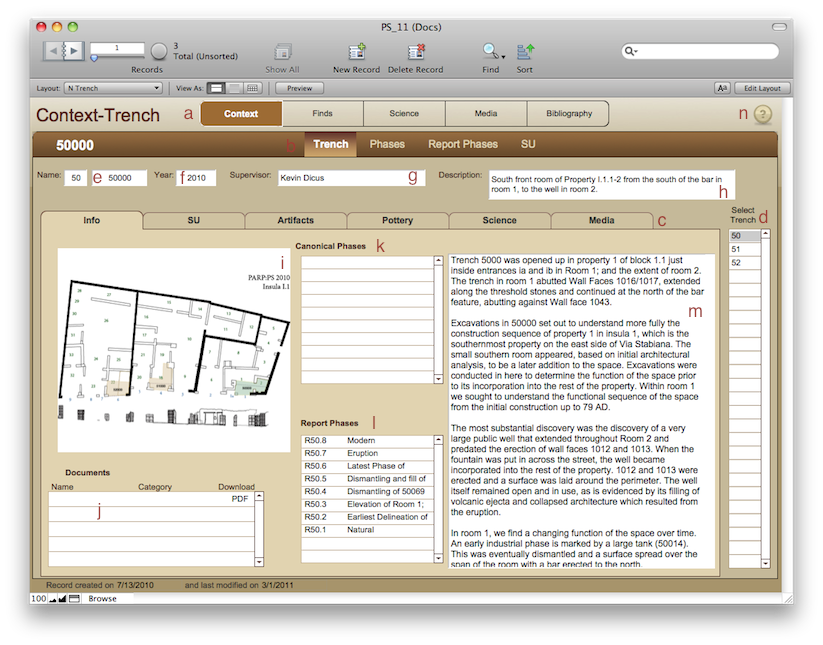
There is a question mark graphic (n) on most of the layouts which will take you to the appropriate help page in this manual.
Use the toolbar at the top (a) to switch between the major categories. If the database finds records that are related, it will show you only those records. For example, if you are looking at trench 51000, as above, and you click on Finds you will see just the finds from trench 51000. This works in reverse, too. If you are looking at a small find from trench 52000 and you click the Context button you will be taken to the trench records from 52000. If there are no related records, the database will take you to the necessary layout and show you all records.
Use the sub-toolbar (b) to move between categories of material. The Context toolbar, for example, can show records from the Trench, Phases, Report Phases, and SU levels.
Use the tabs (c) to see summaries of data based on your context. In the image above, if you click on the SU tab you will see all associated SUs from that trench. Clicking on Artifacts will show you all artifacts from that trench, etc. If you are using the Report Phase sub-toolbar (b) you will see all artifacts from just that phase, etc.
Use the Selection list (d) to move between records within the same table.
Selecting List Data
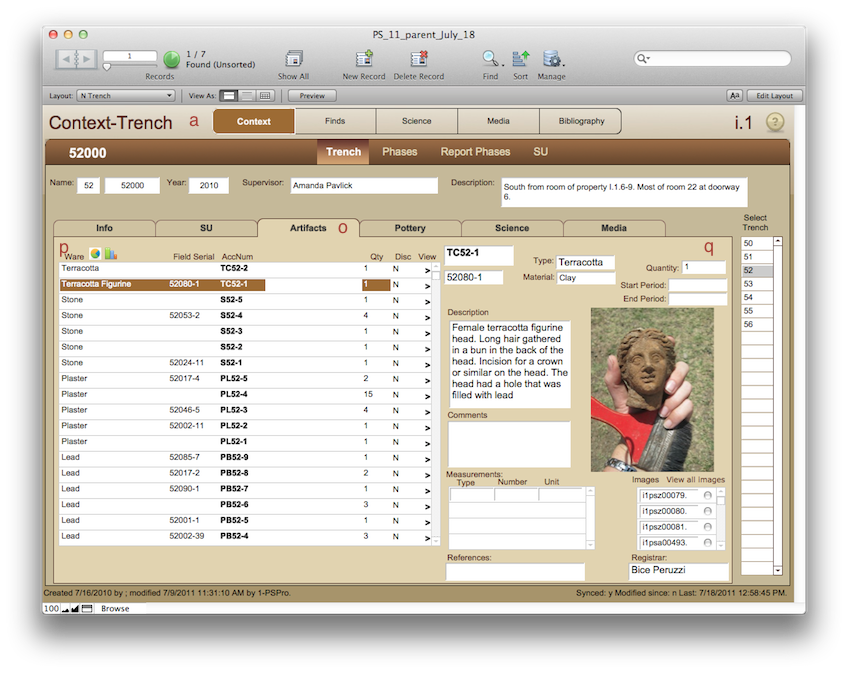
Normally in FileMaker you have a list view or a detailed view. Several of our layouts allow you to look at both together. If you click on the > mark to the right of one of the items in the list view ℗ you can see the detailed information on the right (q). The item that you are looking at will highlight brown so you know which record is being shown. As described above, if you click on the Finds button in the toolbar (a) you will see the same list of finds, just from that context.
Miscellaneous
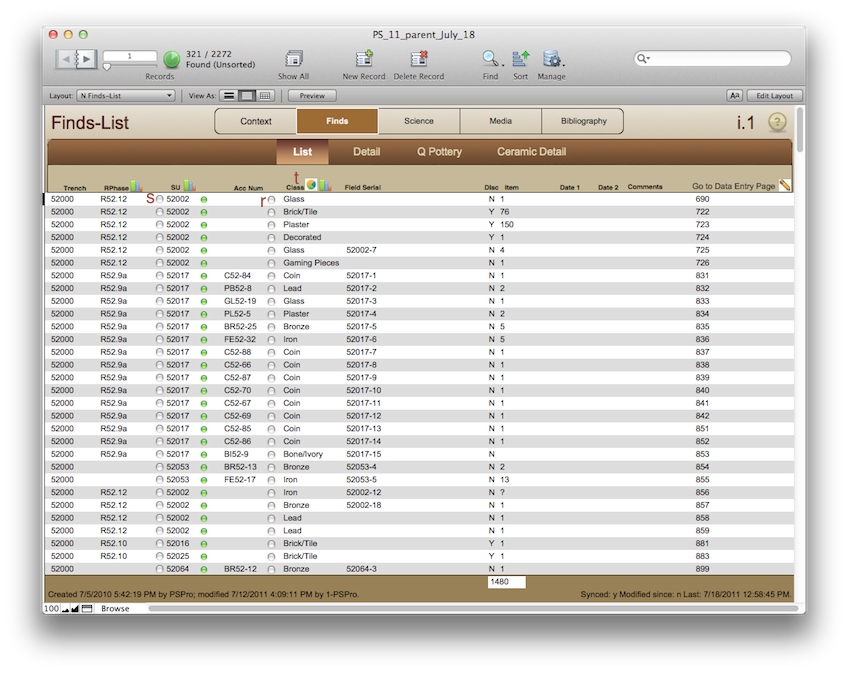
Clear dots  are clickable. In the Finds-List view above, if you click on the clear dot next to the SU (s) you will be taken to that specific SU record. If you click on the clear dot next to the Accession Number (r) you will be taken to the detailed Find record.
Colored dots are data validation indicators. A red dot  indicates that the item does not appear where expected in the database. That doesn't mean the record is wrong, but it is an indication that you should double check what is going on. A green dot
  means that the data in that field appears where it ought to appear in the database.
Clicking on a chart icon anywhere (t) will show you a chart of the material in your found set. For more details, see each screen page.

Sync Info
The bottom of most layouts will show the metadata about the current record. The information on the left (u) shows the creation and modification timestamps and the name of the computer/tablet that last edited the record. The information on the right (v) shows the syncing data: whether this record has been synced with the master database, if it has been modified since it was last synced, and the time stamp of that last sync.